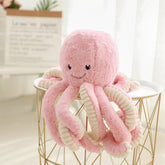
How to Make a Talking Plush Toy: A Step-by-Step Guide
Table of Contents
- Introduction
- Why Make a Talking Plush Toy?
- Step 1: Parts and Materials You'll Need
- Step 2: Recording Your Voice or Messages
- Step 3: Preparing the Electronics
- Step 4: Sewing the Plush Toy
- Step 5: Final Touches and Testing
- Conclusion
Introduction
When we think about the joy that toys bring to children, few things evoke as much nostalgia and delight as a plush toy. These cuddly companions offer comfort, companionship, and a canvas for creativity and imagination. But what if we told you that you can take that experience a step further by creating a talking plush toy? Imagine your child's face lighting up when they hear their favorite phrases or stories coming from their beloved stuffed animal.
At Baby Kid Squad, we believe in making parenting easier and a lot more stylish. Our mission is to offer practical and beautiful products that meet the needs of modern families. Creating a talking plush toy not only provides your child with a unique and personalized plaything, but it also fosters creativity, connection, and endless fun.
In this comprehensive blog post, we’ll walk you through the entire process of making a talking plush toy, from gathering materials to programming the audio. By the end, you will have all the tools and insights needed to craft a toy that speaks your child's voice or favorite stories, ensuring a treasured keepsake for years to come.
Why Make a Talking Plush Toy?
Before we dive into the steps, let’s discuss why making a talking plush toy is a worthwhile endeavor.
- Personal Connection: A talking plush toy can become a cherished companion, offering comfort and a sense of security. When a child hears their own voice or a loved one’s voice coming from their toy, it enhances their emotional connection.
- Creativity: This project encourages creativity as you think about what messages or sounds to include. It’s an opportunity for kids to express their personality and interests.
- Educational Value: Incorporating educational content, like numbers, letters, or stories, can transform playtime into a learning experience.
- Bonding Activity: Crafting a toy together can strengthen the bond between parents and children, making it a memorable experience.
Now that we understand the benefits, let’s get started!
Step 1: Parts and Materials You'll Need
Creating a talking plush toy requires some specific materials, but don’t worry; most of them are easy to find or already available at home. Here’s what you’ll need:
Materials:
- Stuffed Animal: Choose a plush toy that your child already loves or a new one that will become special to them.
- Audio Recording Device: This could be a smartphone, computer, or a dedicated recording device.
- Audio Editing Software: Programs like Audacity (free) or Adobe Audition can help you trim and edit your recordings.
- Speaker: A small toy speaker that can fit inside your plush toy.
- Voice Box Module: This is essential for playback. You can find these at craft stores or online. Look for recordable sound modules that allow you to upload your recorded messages.
- Battery Pack: Choose a suitable battery holder for your speaker and voice box (AA or AAA batteries).
- Sewing Supplies: Needle, thread, scissors, and optionally a sewing machine for easier assembly.
- Optional Decorations: Felt, fabric paint, or other embellishments to personalize the plush toy further.
Tools:
- Soldering Iron (if necessary for connecting electronic components).
- Computer: For recording and editing audio.
- Hot Glue Gun: To secure components inside the plush toy.
Once you’ve gathered all your materials, you’re ready to move on to the next step!
Step 2: Recording Your Voice or Messages
The heart of your talking plush toy lies in the recorded messages. Here’s how to create the perfect audio:
Choosing What to Record
Think about the messages that will resonate with your child. Here are some ideas:
- Personal Greetings: "Hi, I’m your new friend, [Toy Name]!"
- Favorite Phrases: Catchphrases or sayings that your child loves.
- Stories: Short stories, jokes, or even a weather update can be fun.
- Songs or Sounds: If your child has a favorite song or sound effect, consider integrating that as well.
Recording Tips
- Quiet Environment: Choose a quiet space to minimize background noise during recording.
- Clear Speech: Speak clearly and at a steady pace. If you’re recording a story, consider using different tones for characters.
- Duration: Most voice boxes have a limited recording duration (usually around 10-30 seconds). Keep your messages concise and engaging.
Editing the Audio
After recording, you may want to edit your audio for clarity and length. Here’s how:
- Upload the Audio: Transfer your recordings to your computer and open them in your audio editing program.
- Trim: Remove any unnecessary silence at the beginning or end of the recording.
- Adjust Volume: Ensure the volume is consistent and clear.
- Save the File: Export the edited audio files in a format compatible with your voice box (usually WAV or MP3).
Once you have your audio files ready, you’re one step closer to bringing your talking plush toy to life!
Step 3: Preparing the Electronics
Now that you have your audio files, it's time to set up the electronics that will facilitate playback.
Setting Up the Voice Box
- Insert the Audio: Depending on the type of voice box you purchased, follow the manufacturer’s instructions to upload your audio files. Some modules will allow you to record directly onto them, while others may require you to upload files via a computer.
- Test the Playback: Before integrating it into the plush toy, test the voice box to ensure the audio plays correctly. Make adjustments if necessary.
Connecting the Speaker
- Wiring: If your voice box requires additional wiring, carefully follow the instructions provided, ensuring all connections are secure.
- Battery Connection: Attach the battery holder to the voice box, ensuring that your setup can be powered adequately.
Ensure Safety
If you're using soldering or any sharp tools, be cautious, especially if children are nearby. Always supervise and guide them through the process when necessary.
Step 4: Sewing the Plush Toy
With your electronics set up, it’s time to prepare the plush toy for its new voice!
Preparing the Plush
- Opening: If your plush toy doesn’t have an existing opening, carefully cut a small slit in a discreet location (like the back or bottom). Ensure it’s large enough to fit the voice box and speaker.
- Stuffing Adjustment: If necessary, remove some stuffing to make room for the electronics.
Sewing the Features
- Sew the Mouth: If you want your plush toy to have a mouth that appears to move when it speaks, you can sew a simple mouth design using contrasting fabric or thread.
- Attach Eyes: If you’re feeling adventurous, you can also sew or glue on eyes that give the toy a more expressive look.
Inserting the Electronics
- Insert the Speaker and Voice Box: Place the voice box and speaker inside the plush toy, ensuring they are secure and that the speaker is facing outwards for clear sound.
- Close the Opening: Once everything is in place, sew the opening closed. You can use a needle and thread or fabric glue if sewing isn't an option.
Step 5: Final Touches and Testing
Now that your talking plush toy is assembled, it’s time to test it out and add any final touches.
Testing the Toy
- Power On: Insert the batteries and power on the voice box.
- Test Playback: Press the button or trigger that activates the audio playback to ensure everything works as intended.
Personalization
If you’d like, this is the perfect time to add any decorative elements to further personalize the toy. Use fabric paint, markers, or additional fabric pieces to enhance its appearance.
Fun Ideas for Personalization
- Add a Name Tag: Create a small fabric tag with your child’s name or a special message.
- Dress it Up: Consider creating or purchasing outfits for your plush toy to change its look whenever desired.
Once you’ve completed these final touches, step back and admire your work!
Conclusion
Creating a talking plush toy is not only a fun and engaging project, but it also results in a cherished keepsake that can bring joy to your child for years to come. At Baby Kid Squad, we understand the importance of fostering creativity and connection through play, and this project embodies that spirit perfectly.
With your new talking plush toy, you can spark your child’s imagination and create lasting memories. Plus, the process of making it together can be an enriching experience, strengthening your bond as you craft something unique and special.
FAQs
Q1: Can I make a talking plush toy from any stuffed animal? Yes, you can use any plush toy! Just ensure it has enough space to accommodate the voice box and speaker.
Q2: What if I don’t have sewing skills? No worries! You can still make a talking plush toy using fabric glue and following simpler assembly methods.
Q3: Are there pre-made voice boxes I can buy? Absolutely! Many craft stores and online retailers offer pre-recordable voice boxes that are easy to use.
Q4: What types of messages can I record? You can record greetings, stories, songs, or any phrases that your child loves. The possibilities are endless!
Q5: How can I make the toy more educational? Consider recording educational content, such as letters, numbers, or fun facts related to your child’s interests.
By bringing your child's imagination to life through a personalized talking plush toy, you're not just creating a toy—you're crafting a unique experience filled with love, learning, and laughter. If you're looking for adorable plush toys to start your project, check out our collection of trendy baby and children's toys at Baby Kid Squad!


